Skip to content
Mother's Day card: Origami mom's dress

Elvine Assouline - Founder
DYI - Mother's day origami card
What are you planning for Mother’s Day?
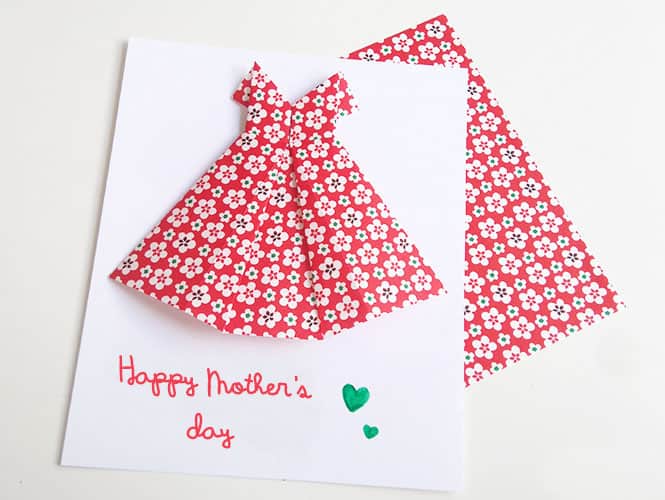
For Mother’s Day (or any special days), make yourself an original card for your mom by reproducing a beautiful origami flower dress.
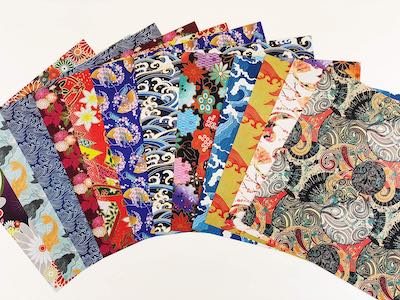
For this origami, you need to have a flower or patterned paper and a little patience to make this pretty mother’s day card. It’s not very difficult, you just have to get started!
Time: 45 minutes
* 8 years old and plus
Material you'll need to make this "Origami mother's day card"


Are you ready?
Our Mother’s Day card will consist of our origami composition glued on a white paper card, which you can make by folding an A4 sheet in half. I trust you to leave the sweetest words inside for your darling mom.
Making our origami mom's dress
In this example, we have chosen a red leaf with white flower patterns.
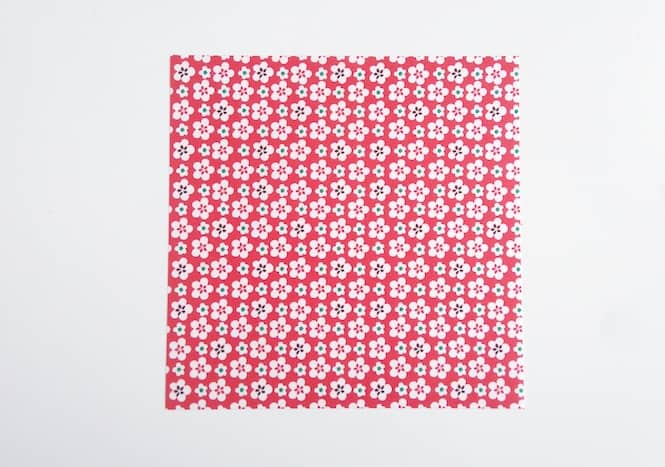
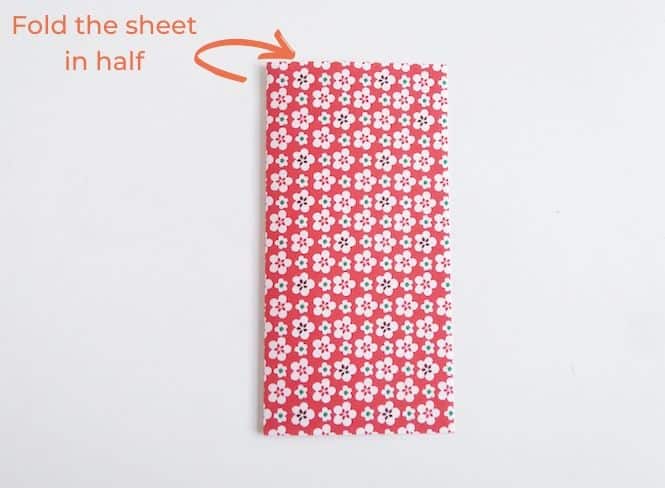
Step 1:
To start, place the white part of the sheet facing you (back of the sheet) and then fold it in half vertically, as shown below.
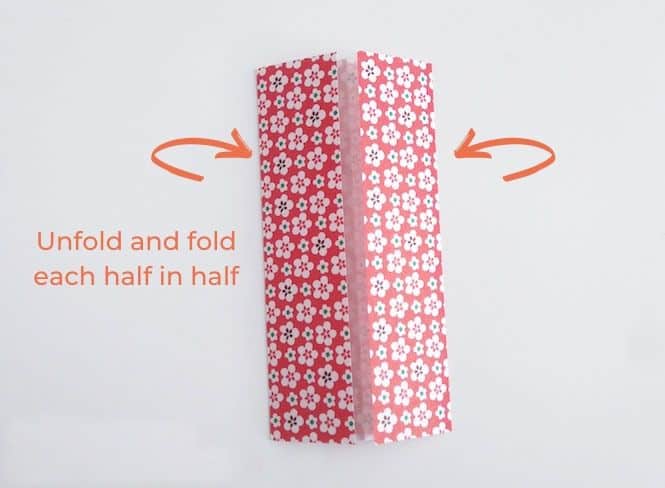
Step 2:
Unfold your sheet, back of the sheet still towards you, then fold the sides towards the central fold previously created in the direction of the height.
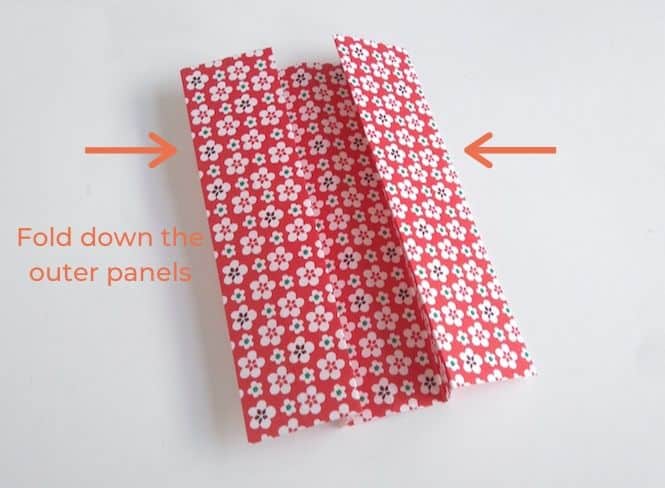
Step 3:
Unfold and turn your sheet over again, this time towards the patterns side. Bring the edges to the center by forming a new fold.
Now you have 4 vertical folds and 3 sides in front of you.
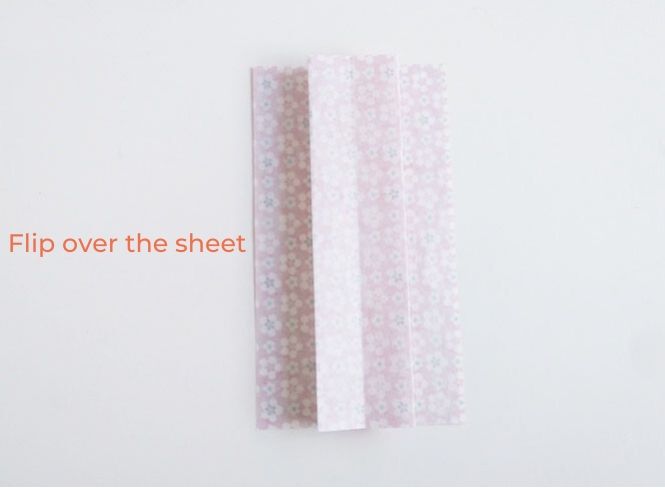
Step 4:
Flip the sheet over (white side towards you) and smooth the folds. You should end up with this:
Step 5:
Arrange your sheet crosswise then fold the sheet in half, leaving about 1 cm protruding (as below)

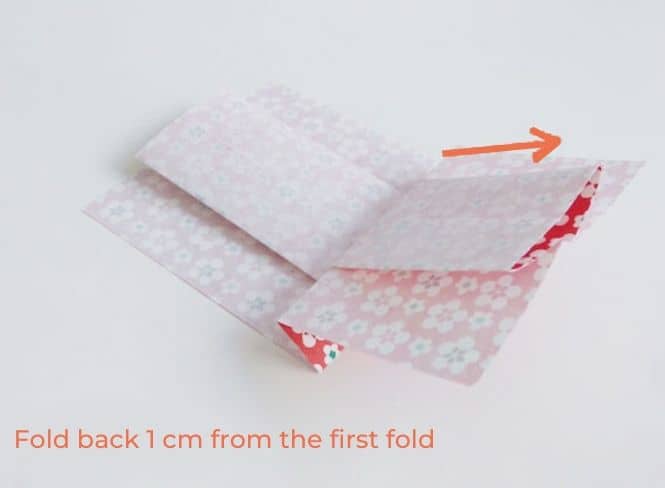
Step 6:
Fold in the opposite direction, forming a second fold 1 cm from the first fold in the previous step 5.
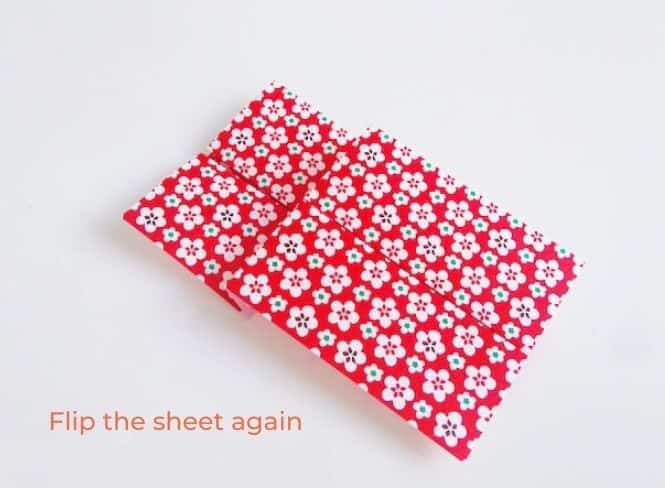
Step 7:
Turn the sheet over to find yourself with the patterned side facing you and smooth the folds.
Step 8:
Ok, it’s now time to stay focus as its getting a little bit complicated but got that!
Gently pull the bottom panels outward then smooth the folds again. Reproduce on the opposite side.

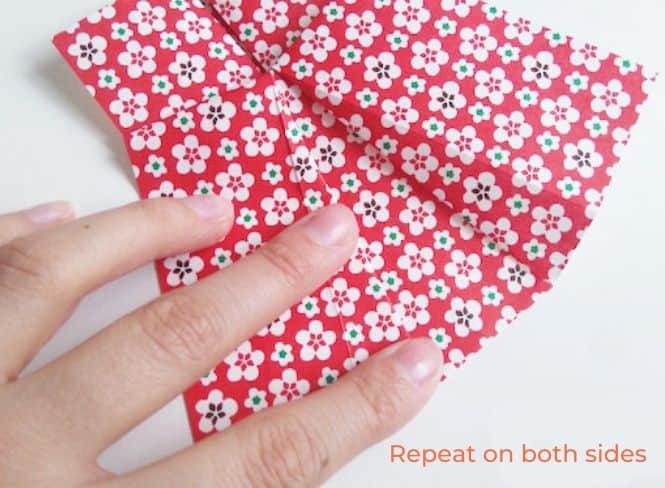
At this point you should have something like this
Step 9:
To form the collar of the dress, fold the upper inner corners outward.
Step 10:
To form the collar of the dress, fold the upper inner corners outwards. Turn the sheet over, patters facing the table, then pull the upper central edge towards the back of the sheet.
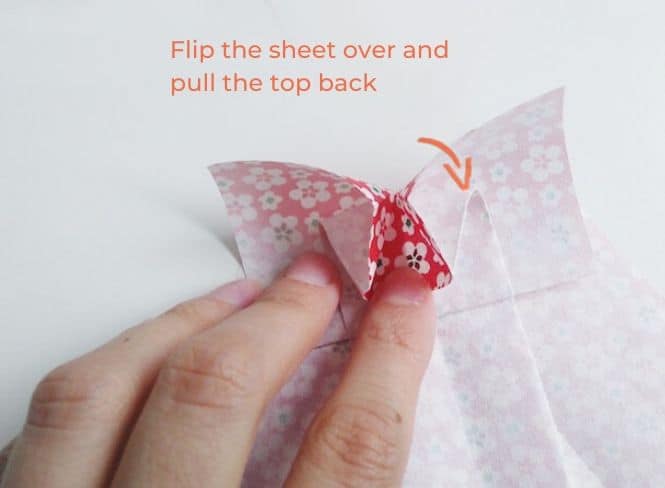
Smooth and mark the folds for a better rendering.
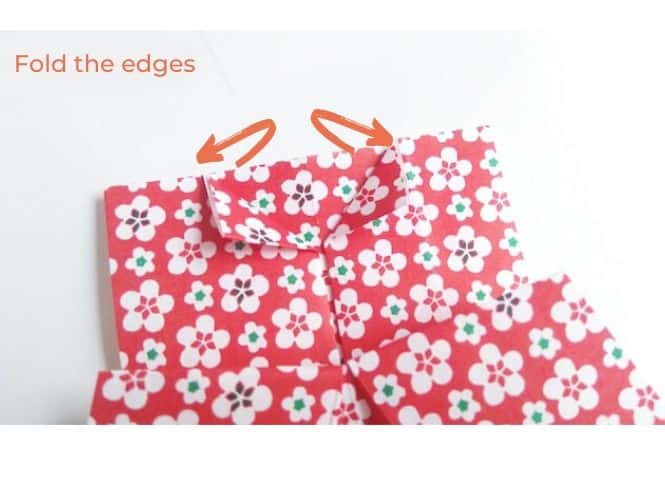
Step 11:
Fold the edges towards the center following the folds already marked.
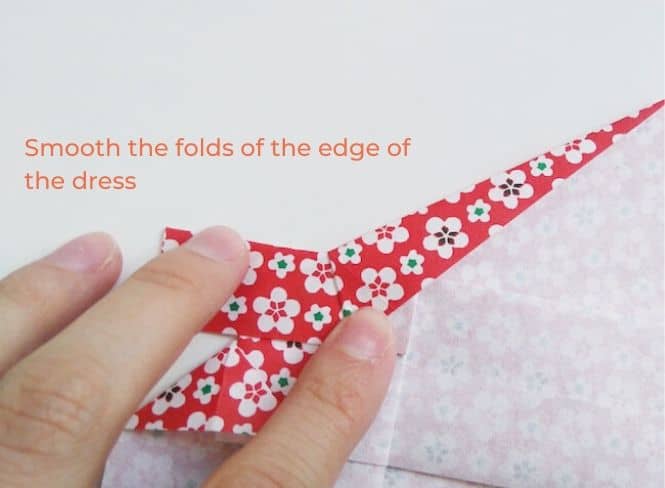
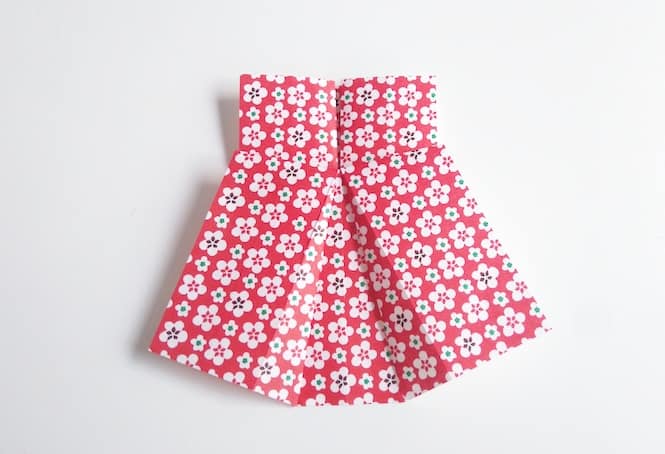
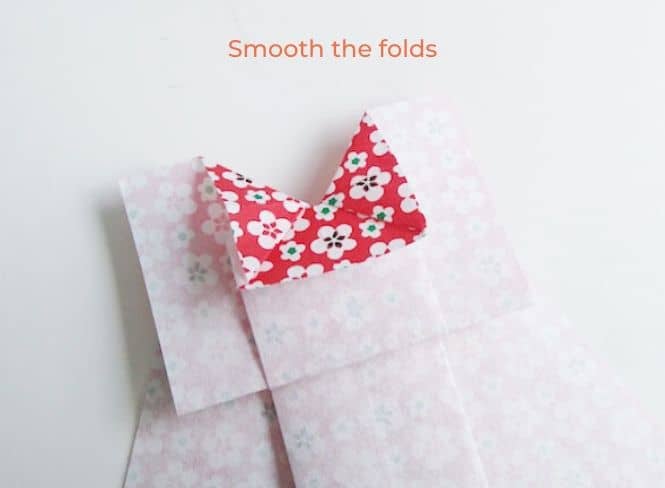
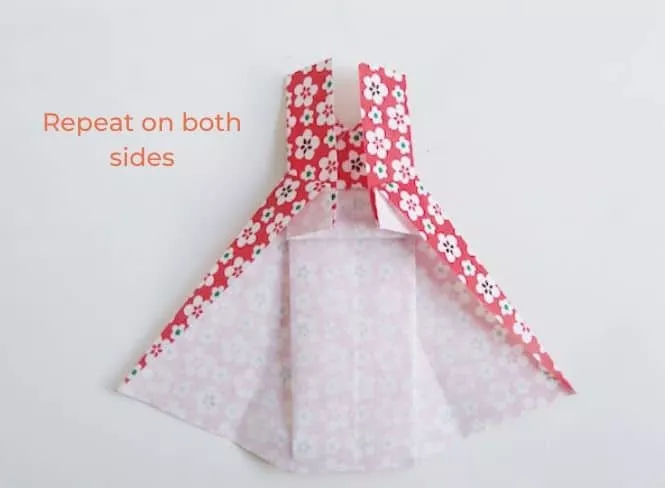
Step 12:
The previous step creates the edges of the dress, go ahead and smooth the folds. Do the same on both sides. You should get a result similar to the image below.
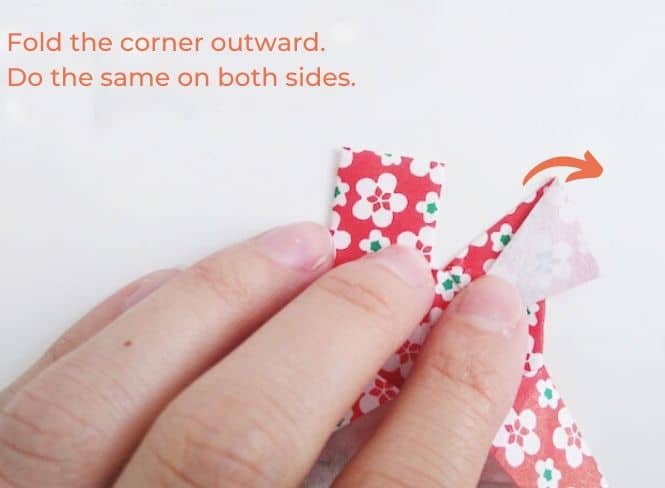
Step 13:
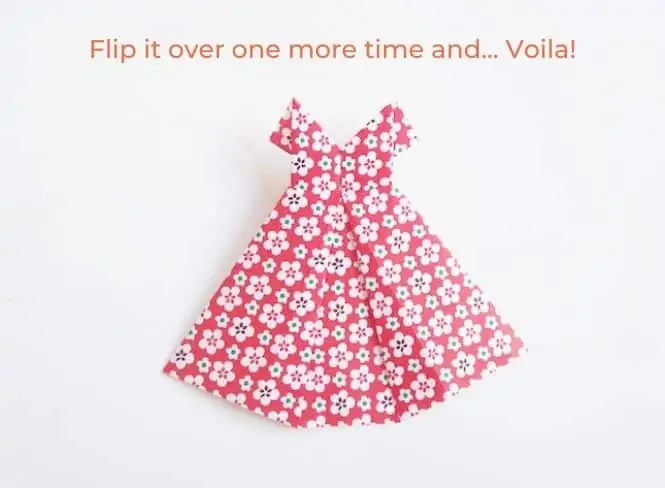
Let’s nailed it and add the little detail that will make the difference with the sleeves of the dress. Fold the upper interior corners outward.
Flip your origami to finally admire the result! Well done! You did a great job!